
In the Output panel you find different options to use when extracting information from IFS Applications pages. This is where the Output Channels are managed and where you can custom export as well as perform a Quick Print.
Figure 1: Output in Context pane
In order to see the Output panel it must be configured, Configure Context Pane
In order to use an Output Channels it must be configured, Configure Output Channel
No system effects
N/A
N/A
The Output panel contains the following options to extract information.
There are two different options to use an Output Channel:
Note: At least one Output Channel must be defined, read more about Configure Output Channel.

Figure 2: Use Output from Context menu in IFS Applications page.
The following question will be displayed:
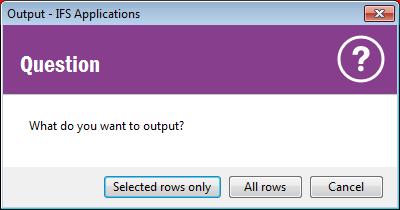
Selected rows only means that only the rows that you have highlighted will be exported/transferred. All Rows means that all rows that are populated in the page will be exported/transferred.
The information will now be displayed based on the settings in the Output Channel you have used. E.g. if it's defined to open Excel the Excel will will be opened with the extracted data.
Note: Output Channels are most suited when you use them to create output files using the data already retrieved into Enterprise Explorer windows. If you select the All Rows option above, then the Enterprise Explorer would start to extract large amounts of data from the database, which might affect your application performance until data extraction is done. In such a scenario, it is advised to use Excel Quick Reports rather than Output Channels which would allow for much better performance.
Save As allows you to save information from an IFS Applications page to a file. There are two different options to use this function:
The dialog below is displayed:

Figure 3: Saving As Dialog
Specify file name and via the Save as type drop-down list you select which file type to use. The list contains the file types from your existing Output Channels. Click Save button to save the file to disk.
If you wish to export data without creating and saving an output channel you can use the Custom Export button. This allows you to specify the file type and the numerical settings for your data export and export it directly. Use this option to export a file fast easy without saving the export settings for future usage.
Highlight information in an IFS Applications page, open the Output panel and click Custom Export button, the Custom Export dialog is displayed.

Figure 4: Custom Export dialog
Specify the settings you want to use for the export and click OK button. You will then be asked if you want to select all rows or the selected rows to be sent to an output.
Figure 5: Custom Export - What Data to Output
Then the Save As dialog will be displayed.
Figure 6: Save As dialog
After deciding on the file name and the location to save, a file containing the output data can be saved using the Save button.
Use Quick Print to quickly print out information from an IFS Applications table/overview page. The printout will display conditional formatting rules if defined, read more about Conditional Formatting.
Quick Print is using standard Print and Preview dialogs where you can select how many pages to print, number of copies, select printer, etc. Company Logo and company name is shown in the first page, read how to Configure Company Logo. Note that the printout will include all columns that area visible in the page. If you prefer a few columns only you need to hide them before printing. Read more in Adjust Columns in Tables
There are two different options to start Quick Print:
You will be asked if you want to print Selected Rows Only or All Rows.
The Print dialog below is displayed:

Figure 7: Quick Print - Print Dialog
Select printer, page range, number of copies and click Print button. The Preview dialog below is displayed:

Figure 8: Quick Print - Preview Dialog
Click Print button in the upper left corner to print, close the dialog if you don't want to print.
A system parameter is introduced to specify the URL of the Company Logo to be used in Quick Print. If this parameter is not specified or system fails to load specified logo, the IFS logo will be used in quick print.
Quick Print uses the ‘companyName’ report variable specified in ‘Report
Site Texts’ as the company name to be shown in the first page.